If you have brought that dream undercounter ice maker to your home, the next question is how to install it.
You already spent good money on that machine and hiring a plumber means still more dollars going out of your pocket.
Unlike Portable Ice makers, you have to struggle a bit when you get your new Undercounter ice make to get it installed.
But what if we tell you that you can install it all by yourself?
Yes, you can do that very easily. All you need is some help from professionals (we will guide you there), a guide of instructions from the manufacturer (that usually comes with the ice maker), and a few basic tools.
So let us get started!
Required Tools
The installation is not going to require any fancy tools given that you have a drain hole and water supply nearby.
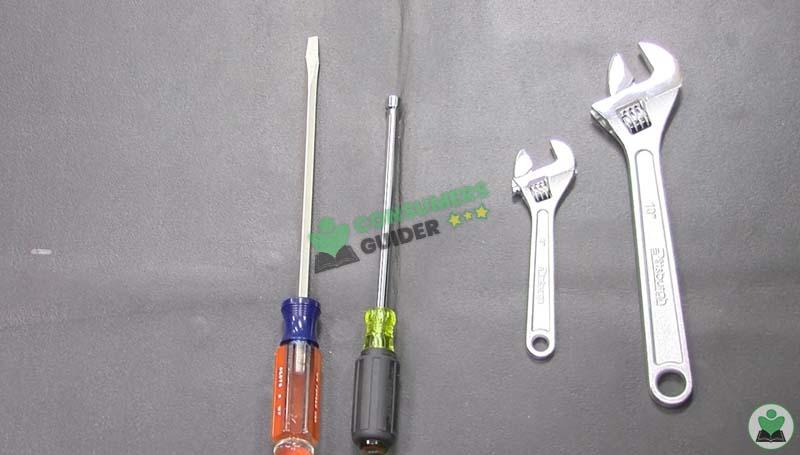
All you need is a screwdriver, a nut driver, and two adjustable ranches for the purpose.
Pro Tip: Do you have a pair of hardware gloves at hand, make sure to use them. They can save you from any injury during your work.
Required Supplies
You will need a water line of a quarter of an inch in width to attach to the pipeline and the machine.
In addition to the water supply, your ice maker is going to need a drain hole. Unless you have purchased an exceptional model where the ice maker works as a freezer too. In that case, you don’t need a drain for your ice maker.
But, in most cases, the storage bin of the undercounter ice makers is only insulated and not refrigerated. The stored ice does not melt instantly because of the insulation but it eventually does if not used in time.
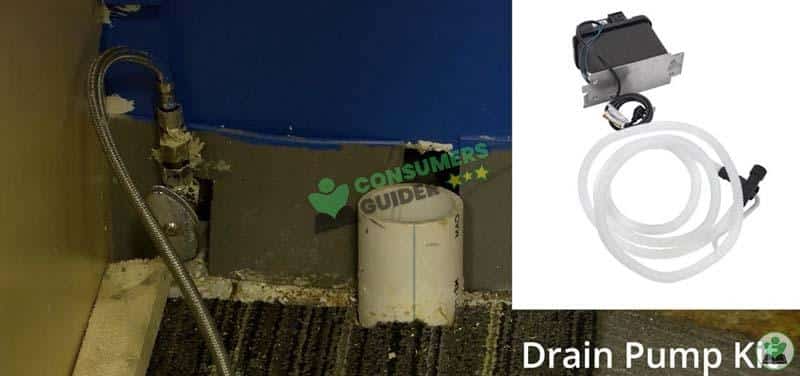
For the next step, you need to check your requirement for a drain pump.
- If you are going to install your ice maker outdoors, you may not need a drain at all. Water can simply drain out of your machine and find its way out.
- If you have a drain hole really close by, you can attach your machine to it and gravity will do the rest. The water will travel out of the machine and into the drain hole on its own.
- But, unfortunately, if you do not have a drain hole near your place of installment, you are going to need a drain pump and a drain hose. That is only if your unit does not have a built-in drain pump. If you have bought one with the pump, you are good to go.
Approx. Installation Time: 20 Minutes
Steps to Install an Undercounter Ice Maker
Here is a step by step guide on how to install your undercounter ice maker.
Pro Tip: If you are not a professional, you can take notes from our guide and make a checklist too. When you are done taking every step just go through it one last time to make sure you have done everything correctly.
1. Read Instructions
Every model is different. The instructions for one undercounter ice maker may differ from the other. So make sure you do not rely only on the internet. ALWAYS read the instructions on the box and also that come inside the box and prefer them on what you read here.
Our intention is to help you with the basics that are almost the same with every undercounter ice maker.
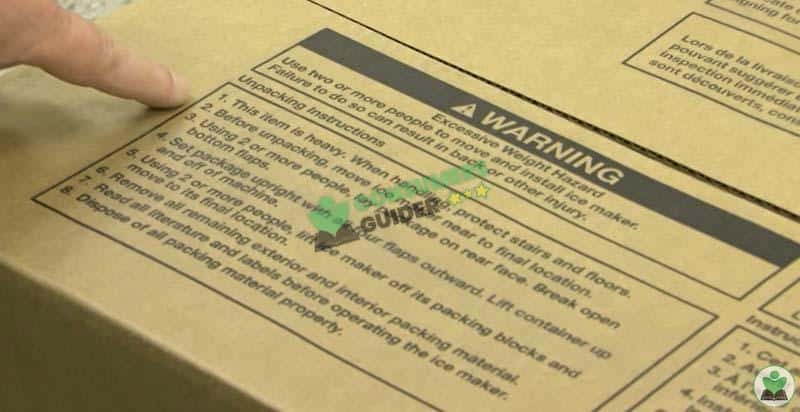
2. Unboxing
You certainly don’t want to break or scratch your unit before you install it. For that, you need to follow a few steps.
Don’t try to pick up the machine all alone. It may be heavier than you think, depending on the model you have purchased and you may end up with a back injury.
Start by laying your box horizontally on the floor. Remove the tapes. Open all four flaps of the box and make sure they are out of the way.
Once all the flaps are away from the machine, make it stand vertically and pull up the carton as smoothly as you can.
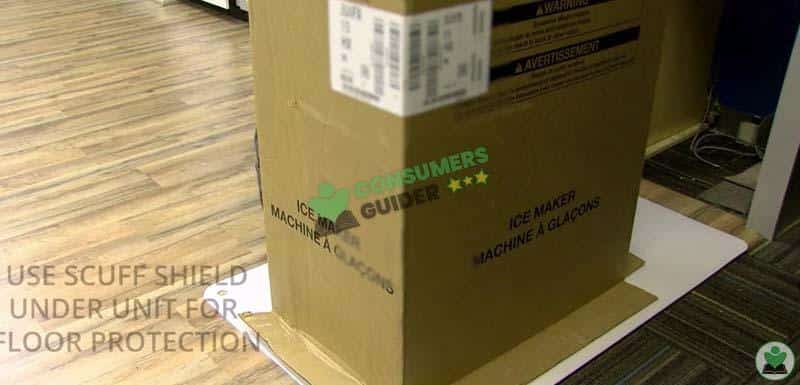
Unpack everything you find in the storage bin of the ice maker, like a manual, scoop, or whatever is in there.
3. Secure the Hoses
Now that you have got everything you need, get down to real work.
This work can be super easy if you are working with a gravity drain option. All you need to do is:
- Attach a drain hose and insert it into your drain hole.
- Connect the water inlet line.
- Be sure everything is secured tightly and you are halfway through the installation process.
But if you are installing a machine with a built-in pump, you need to do some extra effort. Don’t worry. We are going to help you with it in a few easy steps as follows.
- Use your nut driver and open up the back panel.
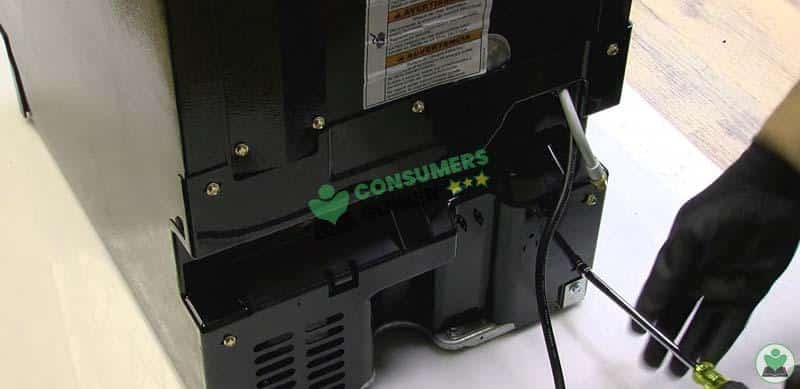
- Insert the water inlet line from the opening in the panel.
- Insert the drain hose from the same opening in the panel.
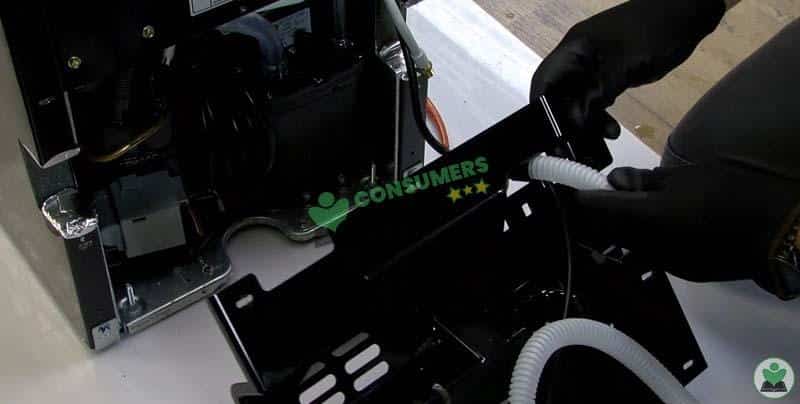
- Secure both hoses to their assigned slots.
- Double check the joints for surety.
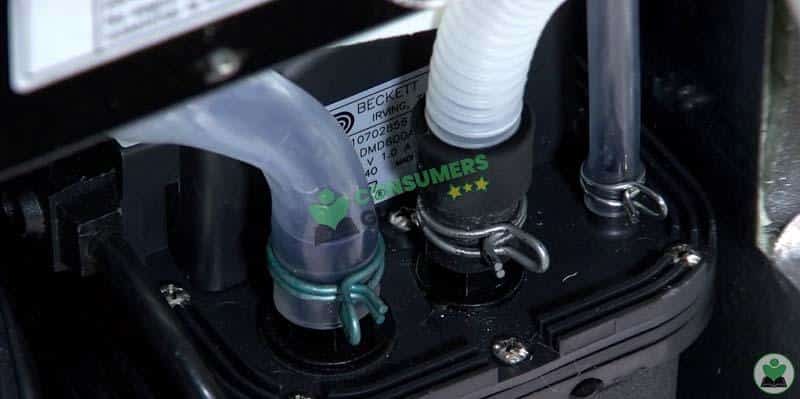
- Put the panel back in its place and close it with the help of the screws you loosened before.
- Clap for yourself because you made it!
4. Connect Water Supply
Once you have connected your water inlet line to the ice maker, connect the inlet line to the main water supply line.
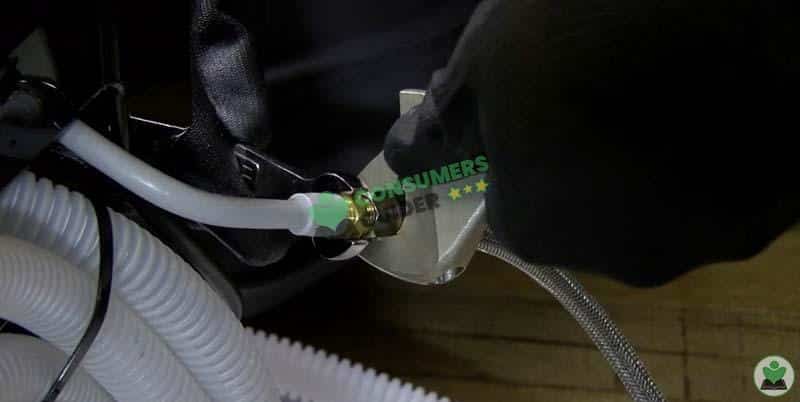
Pro Tip: It is always preferable to connect your water supply with a separate valve that opens or closes the water connection. In case you need to shut down your machine it will be far easier to shut down the separate valve instead of shutting down the water supply of the whole house.
After you have connected the water supply, let the water run for a while. It will give away the leaks. You need to mend it if you find one.
5. Set the Drain Hose
Make sure you insert the drain hose in its hole or your kitchen will be flooded with water before you know it.
6. Plug-In
Most of the undercounter ice makers come with a standard three prong switch. You do not need to provide an adapter or make any other alterations. Just plug it in and you are done.
7. An Extra-Safety Measure
Before you push your unit into its actual place, take the extra length of the water supply line and electrical code and secure it with the side of the ice maker. It will save you from undesired kinks in the waterline and also the pinching of the cord.
8. Make it Level
Your ice maker has to be completely leveled in order to work properly. Use a leveler to check if it is uneven from side to side or back to front.
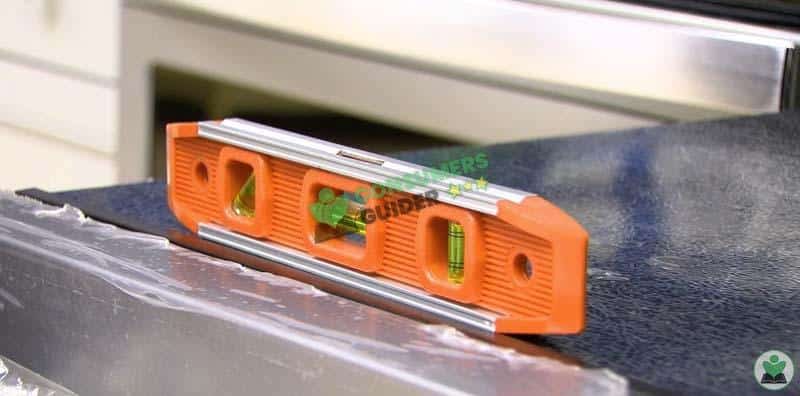
If you find it uneven, you will have to make use of your ranch and adjust the feet underneath it.
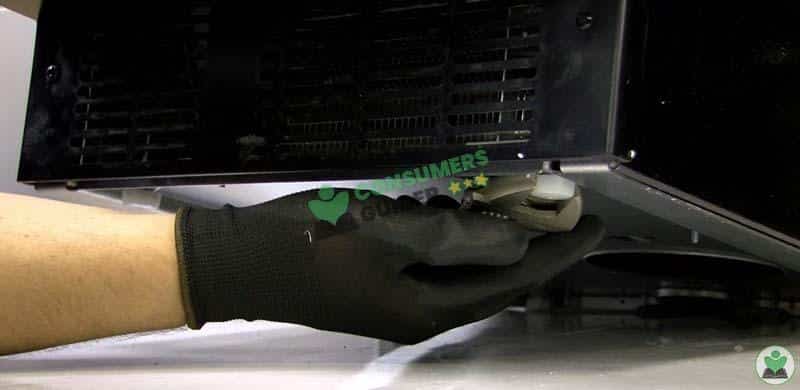
9. Some Final Steps
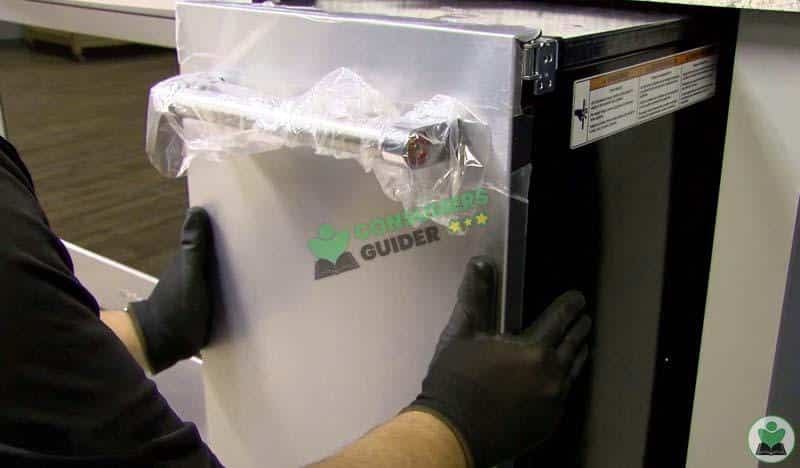
Slide the ice maker into its place under your counter. Now that you are done with all the connections, you can take off the safety packing from your unit so it looks neat and beautiful in its original colors.
10. Filter Installation
If your ice maker comes with a built-in filter you still have one step to go further.
Follow the instructions on your unit and insert the water filter to its assigned slot. Once again, make sure that it has seated perfectly in its place.
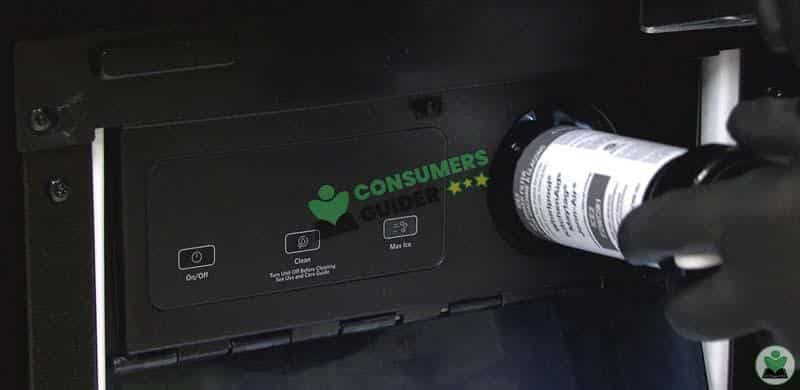
But if you want to connect a filter to your ice maker which does not come with a built-in filtration option, you have to connect it to the water supply line at the back of your machine.
11. Double Check the Drainage
Before you start your ice maker, you must check if the drain is working properly. Pour some water into the storage bin for the purpose and see what happens.
If all the water drains out immediately, you have done a great job. If not, look for the hidden kinks in your water hose and fix them before you turn your dream machine On.
Be patient, it is just the last little step you need to take, and CONGRATULATIONS you finally made it!
Some Key Information
Now that you have done the main job of installation, you will be getting fresh batches of ice every 10 to 20 minutes depending on the model you have purchased. But, to keep that unit in working condition you must be aware of some key points on how it works.
Water Supply
Your undercounter ice maker needs an unhindered water supply while it is in working condition. If it is hindered for any reason, your unit is going to suffer. So make sure you feed it enough water.
An undercounter ice maker can take anywhere from 100 to 200 gallons of water in order to produce 50 to 100 pounds of ice.
Mainly it depends on the production rate. Know the requirements of your unit and provide accordingly.
Cleaning
Your ice maker needs to be cleaned every 6 to 9 months depending on the usage. Do not expect to work it properly if you do not clean it properly. You can also check our guide on “How to Clean an Ice Maker” for detailed instructions.
And do not forget to clean your ice maker after you have installed it. To avoid any health hazards you need to clean it before it makes ice for you.
Fix Your Machine
If you own a machine and it stops working, you must have some basic information to find where the fault lies. Here are a few steps you can take if you face such an inconvenience.
- Check for the kinks. Take your machine out from its place and see if there are any kinks in the water line or drain hose. Fix them.
- Make sure it is clean.
- In case you have a filter attached to the unit, make sure you have changed it in the previous 9 months.
- Check if there is any problem with the plug.
- Reset your machine to see if it resumes its job.
- Call the help service if none of the above mentioned steps worked.
Frequently Asked Questions (FAQs)
Can I install an undercounter ice maker by myself?
If you follow all the given instructions and take help from this detailed article, you can pretty much do it even if you have not tried such a thing before.
How can I clean my undercounter ice maker?
Many machines come with an auto-cleaning option. You just have to set it to clean and it will work by itself. You can also take help from our article “here” for a detailed version.
What is a feeler arm?
Most ice makers have an arm that senses the availability of ice in your ice maker. If the storage is full, it is with the help of this device that your ice maker knows to stop making more ice. If the capacity is not full, the ice maker continues to work.
How to reset an undercounter ice maker?
If your ice maker has stopped working and you need to reset it, here are a few steps you can take.
- Check if the feeler arm is stuck. If so, try to push it down so it knows you need more ice.
- Look for a reset button on your machine and press it for a few seconds.
- In case you don’t have a reset button on your machine, or you can’t find it, simply take the plug out. Let it rest for a few minutes and plug it in again.

